Alaska Fish & Wildlife News
September 2018
Smoked Canned Salmon

The last time I canned fish was several years ago, when I canned several cases of fresh pink salmon caught on the ocean. In the meantime, I’ve received some excellent smoked canned salmon from my sister in law in Craig, so decided to learn how to make it myself.
I was lucky to run into a family that was fueling their boat at the same time as I was one Friday in August. They told me there was a good coho bite over by their cabin, so I headed over there the following day and caught six nice coho salmon.
As I’ve written about before, the most important period for maintaining a quality fish product is the first 20 minutes the fish is out of the water. Coho at sea, in particular, need to be bled, dressed and chilled as soon as possible. Coho can get what is called “belly burn” when they are feeding on certain types of food. If the fish is not dressed (i.e., entrails removed) soon after capture, a bacteria begins to grow and when the fish is finally eviscerated there will be a brown spot in the cavity, which will reduce the quality of the fish.
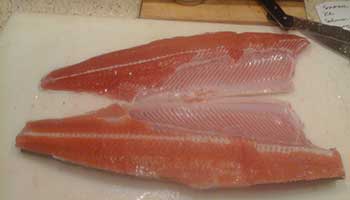
When butchering salmon for smoking, some people cut longitudinal strips from fillet pieces for canning. I like to can the fish with the bones in, since the canning process makes the bones soft and edible (and tasty). I also leave the skin on. I’ve seen others advise to scale the fish before smoking, but the scales dissolve in the canning process and I’ve never seen the need to do this.
I fillet off one side of the fish in the normal fashion. I leave the backbone in the other fillet. (The bottom fillet has the backbone in the photo). Then cut each side into portions to smoke.

Similar to an earlier article I dredge the pieces in a 50:50 salt and sugar dry mixture (no liquid), and stack the pieces flesh to flesh in a bowl. I’ve found for my taste about 40 minutes in the dry brine is about right. After that, I rinse all the pieces thoroughly and let them drain for a few minutes in a colander.
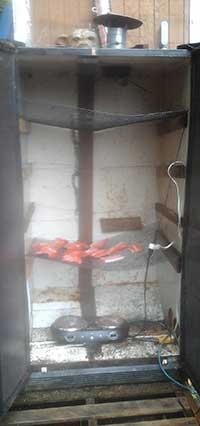
I made my smoker from an old refrigerator. It has a 3 inch hole in the top with a stove pipe and cap to keep the rain out. On the inside of the smoker, I mounted an electric fan under the hole in the top. Then on the right and left wall of the smoker near the bottom I cut holes about 4-inches wide and 16-inches long. These I covered with netting to keep bugs out. The fan draws the air through the bottom holes and up through the fish to speed drying.
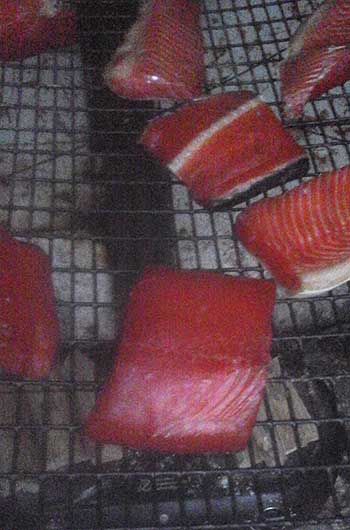
I leave the fish with just the fan on in the smoker for a day or two until the outer layer of the fish flesh is shiny and dry to the touch. This is called a pellicle. Once that’s established, I put a double burner electric hotplate in the bottom of the smoker, and put a few chunks of debarked alder on the burner for smoke. It’s important to remember that you are going to cook the snot out of these fish for nearly two hours at 240 degrees in the canner. Unlike smoking salmon to eat fresh, the smoking process here does not need to reach some internal temperature for food safety, but merely to get the texture and smoke flavor you desire. Canning will magnify the intensity of the smoke flavor, so I only put on one batch of the alder chunks. Less smoke is better when canning.

The salmon may be a little softer than you are used to when it comes out of the smoker, but that’s okay. It will firm up nicely in the canner. All you are looking to do in the smoker is make a shiny pellicle for texture and a little smoke at the end for taste.
I unload the smoked fish to a bowl, get my jars ready, and start loading the jars. I use scissors to cut strips to size to fit the jar, and pack the strips as tightly as I can.
One trick I’ve learned to speed up the canner heating process is to start the canner on a propane crab cooker. This quickly brings the water in the canner to a boil for the 10 minute venting process. After the venting process is complete, I move the canner to my kitchen stove, wait for the canner weight to reach 10 lbs of pressure and start jiggling, then set the timer for the 110 minute cook time as instructed by the University of Alaska Fairbanks guide (Link to download the PDF).
The recipe and procedures I’ve listed here are just an overview. Always refer to qualified authorities like UAF’s Cooperative Extension Service for specific procedures to pressure cook salmon in jars or cans. Asking for information on your Facebook account is not the way to go. Canning must be done right or botulism may result. And botulism can lead to death, which is very bad.

Your University of Alaska’s Cooperative Extension offices can answer most questions about canning.
Canning fish takes time up front to preserve fish, but when honed to your preference for texture and taste, results in a consistently good product that’s ready to eat, maintains the quality of the fish you put in there for many months, preserves the fish without refrigeration until the jar or can is opened, and is easy to transport. And there’s never a worry about freezer burn.
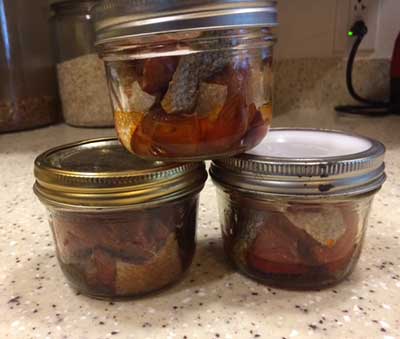
I’ve canned smoked salmon in both pints and half-pints. There will be a nice layer of salmon oil in the bottom of each jar. This keeps all of the salmon in half pints moist. The fish in the top part of a pint jar may dry out a bit more, so for my taste I like using half pint jars. Either way, the salmon is the main course, and the slightly smoky oil left behind is the dessert.
Caring For Your Catch: http://www.adfg.alaska.gov/index.cfm?adfg=wildlifenews.view_article&articles_id=777
Mark Stopha is a former salmon troller and direct marketer. He’s currently a fishery biologist for ADF&G in Juneau. Feel free to contact me at Mark.Stopha@alaska.gov for tips on fish handling.
Subscribe to be notified about new issues
Receive a monthly notice about new issues and articles.
